Today I have the next part of our unit study on South America ready. I have vocabulary words and copy work.

Because I had to get so many last minute details done for the party and because I have been working with Tiny on composition this year, I wanted to keep the vocabulary words fun too instead of listening to the whining and moaning doing lots of writing.
So I made the words to be used in one of two ways. You can cut them out, fold in half, glue and use like flash cards. The word is on the front and the definition is on the back. Or, you can cut the strip in half and do a mix/match where you have them match the word to the definition. Either way is a lot more fun than writing, which right now Tiny has an aversion to.
Today, he will be doing some easy copy work. We read a short passage or a letter, a primary source, written by Simon Bolivar about how he wanted to unite South America. So it was perfect to use for our copy work.
You know I told you that I have all my boys do copy work for a long time, even into high school and that I sneak some in too for myself at night. I am a true believer and fan of copy work because you can just concentrate on the beauty of words or ideas at the moment and can either be inspired or not. There is no analysis or etymology, it is just you and the delight of words. It’s a way too of igniting a love of writing and vocabulary for a victim of burnout.
Enjoy the newest printables for our unit study. I will be working on getting my photos together of our graduation party so I can share with you and getting my house whipped back into some kind of shape today.
South America Printable Minibooks
Also, look at these minibooks which come in the free South America lapbook 27 page download.
- Animals of the Galapagos fan book which includes the Giant Tortoise, Lava Lizard, Marine Iguana, Green Turtle, Galapagos Penguins, Magnificent Frigate Bird, Blue-Footed Booby, and Blue-Banded Goby.
- Comparing Mountain Climate Zones
- Simon Bolivar Copywork
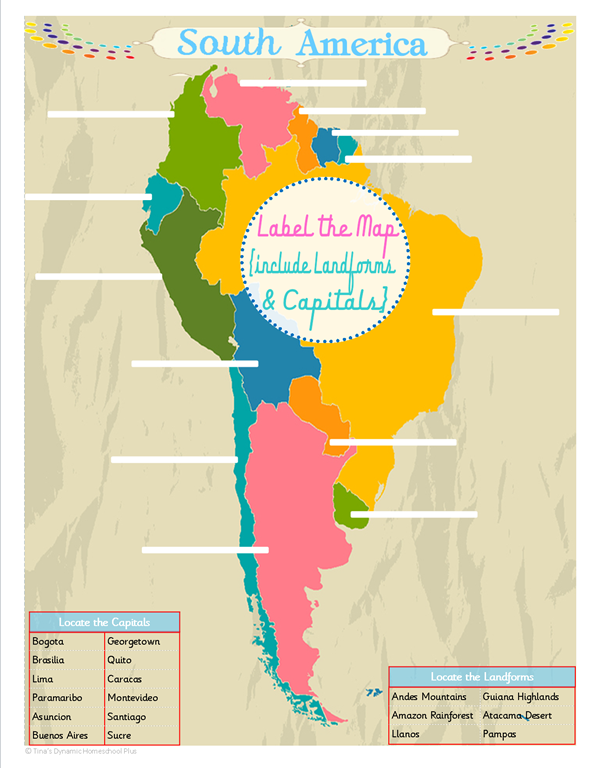
- Map of South America to label and one labeled
- Machu Picchu – Lost City of the Inca
- Negrinho – A dessert from Brazil
- How to Memorize the Countries of South America and Dependent
- Map Flags to put on your salt dough map
- 2 – The Galapagos Island layered book. One prefilled with facts and one blank to add your own information.
- Vocabulary Pocket and Vocabulary Words
More South America Unit Study Resources
- Appreciating the Culture of South America Through Dance
- 6 South America Country Notebooking Pages
- How to Memorize the Countries of South America & Mountain Climate Zones Minibooks
- South America Unit Study– Colorful Free Printable Map
- South America Geography Salt Dough Map + Printable Pennants
- South America Unit Study resources
How to Get the Free South America Printable Lapbook
Now, how to grab the free lapbook. This is a subscriber freebie.
That means when you sign up to follow me, you get access to my subscribers library and this freebie.
However, not all my freebies are in the library (wink).
I like to keep up to date with what is valuable to you so I can give you more, some freebies you must sign up again on the form below even if you are already a follower.
And it’s the only way I have of freely delivering them to you. Just follow the steps below.
► 1) Sign up on my list.
► 2) Go to your inbox and confirm your email from the automatic reply I sent you. If you’re already a confirmed subscriber, you will not have to do this. You’ll receive the freebie instantly.
►3) Last step. look for my reply AFTER you’ve confirmed your email.