
Step 7. Final Step. Organize it/Shuffle Sections/Print your Tabs before you take it to be COIL BOUND.
Please Read Here (Under About the Type of Planner Created) Why I Do Not Suggest Notebooks or to use them for only Special Occasions
Be sure your planner is laid out in the order you like. If you followed my steps, most of it will be organized. However, you may prefer to put Day at a Glance in between each planner page or you may prefer to have a separate section for that and the same way for Journaling. You DECIDE what you like!
Coil Binding The Only Way to Go. {hate sounding so dogmatic, but it’s true}
As far as binding, the way I liked the best is coil bind. For a few bucks more, especially if you printed your pages, it is worth the coil bind. The best reason is that the pages lay flat on my table. Too, the binding does not take as much room on the left margin.
Also, another reason is that the pages do not tear out easy.
Coil bind comes in ALL colors, red, black, white, and even purple and pink. lol. But it just depends on which office supply place you get it bound at as to selection. If you are a true adventurer you can even order ANY colored coil through a binding company and take your own color as I do sometimes.
For example a college town will carry the colors of your local college or even school. Some will just carry the basics like “black and white”.
I use to call ahead to various Office Max locations to see what is in stock before I chose my “cover” so it would all coordinate. But for bigger planners, (real thick ones) the choices are usually limited to either black or white or clear.
Cover and Back
I used to get a clear cover and then a hard back black cover to provide some support because I just didn’t really take it anywhere. That was fine. (This normally is what the average office supply worker usually recommends.) If you choose this, keep in mind you have a selection colors for the sturdy back cover as well. For example, if you choose a purple binding, you can do like a pearl iridescent back. It is very pretty :o) and clean looking, not to mention professional looking.
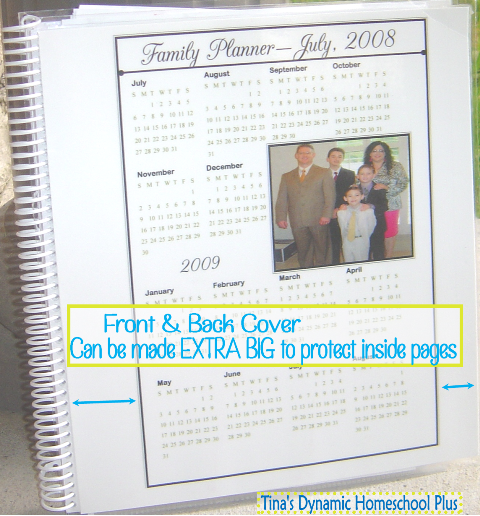
BUT my favorite trick I have learned –is to laminate the FRONT and BACK extra big. Be sure to NOT choose “thin” laminate. A thicker laminate will serve to protect your binder during the year and give it stability.
I have the office supply worker place my front page on a 11 x 11 piece of card stock. Then they laminate over the whole thing PLUS about an inch PAST my cover page. The same way for the back. The office worker laminates an 11 x 11 piece of card stock for the back.
Even though my pic below is not to scale, there is the same amount of room on both the left side and right side of my cover page as shown by the red arrows. Rounded corners too by laminating – NO sharp corners please!
In other words, my front page of my planner is centered on this 11 x 11 piece of paper with about one inch on each side.
You will notice right away that you do not see ANY of my tabs sticking out or the inside pages as the front and back laminated this way protects all the inside pages.
Here is the pic in case this sounds like “mumbo jumbo”
Each year I decide whether I want to make the front and back cover extra large and have it extend out out past my inside pages or just have the cover I take up to Office Max to be laminated and be regular size with my inside pages.
You decide what you want as I am just sharing my experiences each year.
What do I accomplish this way?
1. It is more sturdier than a clear front and hard back.
2. My front calendar page is protected because it is laminated and not loose.
3. The tabs to my pages are “inside” and protected and not getting bent and caught on everything as I “transport” it or cutting me.
4. I can place my planner down on liquids such as water (I have done it before by accident) and it’s okay because the back protected any pages. Just wipe and go.
5. Did I mention your planner just can look SMOKIN’ HOT? It can even match your purse for the year. ROFL
If you need to Go Back:
Click Here for Step 1 Choose a Pretty Front & Back Cover.
Click Here for Step 2 Choose Calendars & Appointment Keepers
Click Here for Step 3 Choose Goals & Objectives
Click Here for Step 4 Choose Lesson Planning Pages
Click Here for Step 5A Just Unique Forms Just for You
Click Here for Step 5B Just More Unique Forms Just for You
Click Here for Step 5C Just More More Unique Forms Just for You
Click Here for Step 6 Personalize It

This is my second year using your planners and I just love them so much. You have made everything so clearly understood and the color choices and designs are simply beautiful. As a teacher turned sahm turned homeschooling mom, it is wonderful to have moms like you supporting us in our own efforts. Your talents and generosity are truly appreciated!
Awwwwwww, so NICE Robin and you are VERY VERY welcome.
I LOVE teachers here and when they are homeschooling moms now, it’s just awesome.
They bring so much experience to homeschooling. Great to have you here and I will continue to share my forms. Thanks for being here and for your super sweet comment. It means a lot.
AT FIRST I WAS SUPER NERVOUS ABOUT HOMESCHOOLING BECAUSE IT SEEMED SO COMPLICATED TO GET STARTED. THANK YOU SO MUCH FOR MAKING IT SO MUCH EASIER FOR ME.
Hi Monique,
You’ll do great!! And you are so welcome.
Too, be sure to join my private facebook group because sometimes its more comfortable to post questions and visit over there too.
https://www.facebook.com/groups/NewtoDynamicHomeschooler/
Such an amazing blessing you provide here. Thank you. Thank you. Thank you! This is incredibly generous of you.
Awwwwwwww, just VERY welcome Jaimie. Thanks for being here.